Refrigeration, Holding Plate.
The majority of this project took place in March, 1997. We still have the same system now going into 2011. Mods to interior airflow with lattice work, were accomplished in 2005.

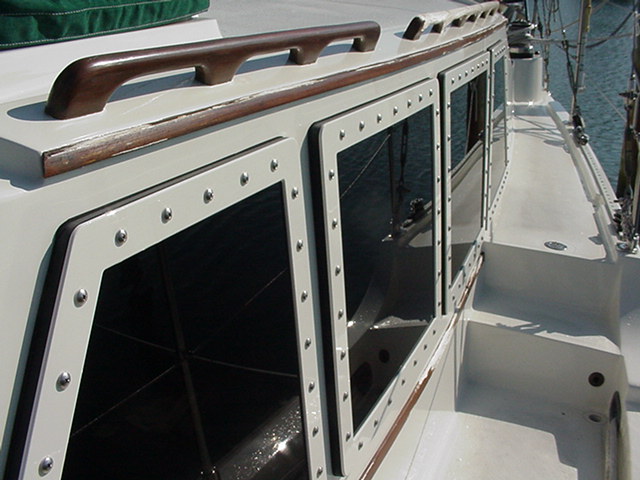
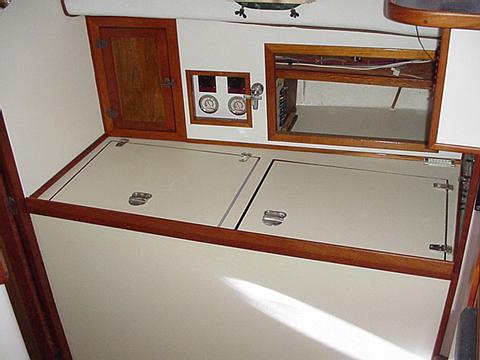
Nearly Finished Product.
All ' lockers' have since been lined with indoor/outdoor carpeting bottom and hull and 1" extruded Pink Foam above, under the side decks.
We did our homework on refrigeration.
I had read 5 good books prevalent in those years and then searched out info.. Then, bought the components to build my own 12VDC system.
The ONLY possible improvement I felt might be made in a 'home built' system is increasing the size of the Condenser. That's it; well except for the eliminating the Profit Margin of commercial builders........... When finished, my unit had all the bells and whistles, plus the next size larger condensor completed for less than $500. not including Holding Plates. When 98% finished, I sold it for just that, as I had decided to go the extra distance and pay for the New Direct Shaft Coupled units being built by Glacier Bay and SeaFrost. I chose the SeaFrost, but both have the advantage of not side-loading the shaft seals(no leaks) and no belt tensioning/less noise/heat etc. They are expensive though!
.jpg)

3 big slices did the trick
Very Expensive from Seafrost but my dream/Glacier Bays technology was just over my ability to pay. Kevin- I love your stuff, but............................I'm a blue collar guy.
After the old box was removed,before framing things in, there's some copper going in.
New framework going in
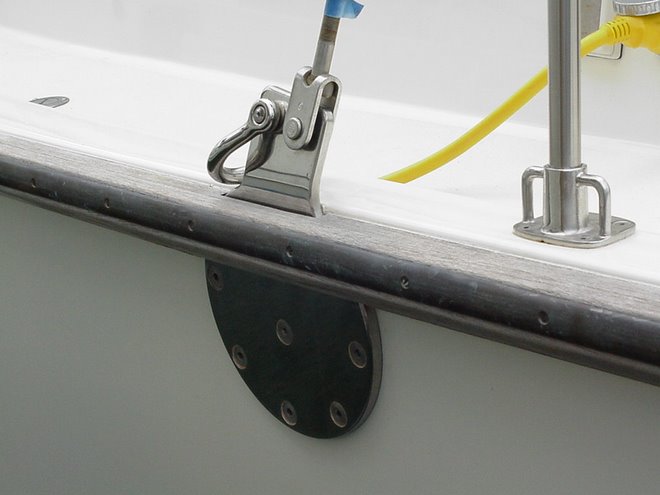
Notice the 2 shiney brass tubes decending vertically along the hull. Inside of these are 6 gauge copper wires running from my chain plates down to a Lightning Ground system I installed earlier. The brass tubes were then glassed to the side of the hull, before installing the refrigeration boxes and foam installation. In this way, if I ever had to remove the wire, I could just slide it in or out of the tube.
Backwards 'question mark' shaped tube is for water supply to a Home Style Filter system which will double filter our water plus provide cold drinking water straight from inside the refrigerator.
The other tubes/black insulation are refrigeration lines that will connect to the Holding Plates later.
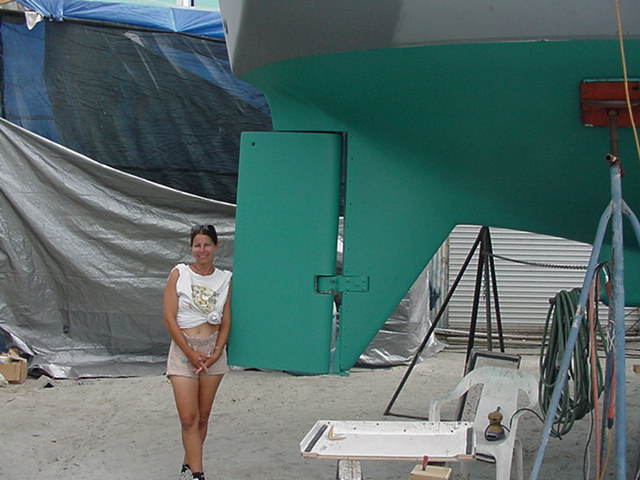
My lovely gal Dorothy and I sweated and strained but successfully removed the old boxes, rolling up our sleeves and breaking out the demolition tools. I chose a chemical tank manufacturer locally to build boxes usin g 1/2" material...impervious to almost everything....heat welded seams.
The rest was Hands On craftsmanship and still more the good old check book.
Installing the Vacuum Panels to exterior of boxes
Removing the old boxes was not too difficult after we got over the scare and finality of the first cut. I used a saws-all and cut the box into sections that would be small enough to get out though our companionways. IT was obvious that at the factory, the refrigeration system was installed before the deck was, but in this rebuild, I had to carefully measure the New Boxes(2) that had to come back into the boat through the companionways!
After removal of the old box, grounding cables were run through copper tubes from chain plates to a massive bus bar under the sole/then to our lightning ground system. I ran the cables thru the copper tubing, in case I ever had to replace them, they would hopefully freely slide out of the tubes. IF foamed in, there would not be a chance.
The decision for insulation material, was to use special vacuum panels built by Ownen Corning and now only available from Glacier Bay. Back a few years earlier(1995) I had had several conversations with Kevin Alston, owner of Glacier Bay about the perfect insulation.
He said IF I could wait, there was going to be a project between a number of companies to develop consumer products, from information downloaded from the Dept. of Defense and NASA. One project was to develop an insulation product that would be far better than anything available to the general public at the moment, based on Aerogel. The insulation would use this aerogel/the lightest manmade material ever, in a panel pulled into a vacuum. I decided to wait. Owens Corning did the research/developing also an R-75/1" thick panel in 5 sizes, but Ownes decided to shut the project down because the panels were too costly to make. I guess they saw no market for them. Glacier Bay bought up the entire stock from Owens.

I sat here at night trying to figure out how I could use the 5 different sizes of panels to completely cover the surfaces I needed covered, on 2 boxes still not built and within the space I had available.
You could compare this to a novice worki
 ng a Rubic's Cube. Eventually I got it worked out. The most difficult part was measuring within the space available especially the curved hull, to the extent I felt sure enough to plunk down $3600. for the insullation. ($300/panel X 12)
Owens Corning R75 Vacuum panels
The boxes were built and test fitted inside an extremely strong framework that was tediously built within the space. SeaFrost's plates and lines were all assembled as a mock up to assure perfect fit. All was dis-assembled and removed then so that the Vacuum panels could be bonded to the outside of each box.
A special adhesive was applied by tube and spreader to the panels. The panels were then duct Taped to the outside of the boxes until set. Extreme care was taken NOT to puncture the metallic foil of the panels. When all had been applied the boxes were again lifted into place and secured. A presurized Iocyanate 2 part foam was shot into all spaces that could be comfortably filled(Thats 99% of it.) When dry, a small can of foam was used to get into the micro spaces that would/could effect leakage. When all done, the new arrangement was covered with 3/4" plywood. We then drilled holes in the plywood, to then fill any remaining voids with the Iocyanate foam until it out flowed from the injection holes. When dry, we scraped and sanded the excess foam away and Formica was used to face all external surfaces. Caulking and teak trim finished the outside. Lids were m
 ade with the same degree of care as was a back panel used for gauges and individual controls for 7 c.f.
  refrigeration and 5 c.f. freezer.
Filing the voids between boxes. One step at a time in a long process of detail. Iocyanate already sprayed in most areas, small can for very minor voids.
An additional touch was our water cooler. Dorothy just loves cold water, but I was concerned over the box being opened an extra 20 times/day between us for drinks, so I added a large filter to act as a water jug running a line from it up and out to a faucet next to the gauges. Just place an empty glass under the faucet and momentarily you can fill it with 35 degree water.
White foam escapes holes drilled through framework to access minor voids

Water filter acts as water cooler. White PVC throws air from a computer fan mounted below it, (I now mount the little fan on top of the tube rather than on the bottom)over all the contents of the box, keeping the box temps even. While this is a nice feature, it adds to energy use, as air is always moving past the door seals which is any boxes' weak link and the fan itself must create some heat although minimal
 Base of Air Tube is kept 1/2" above mat for adequate air intake.
Faucet located outside Refrigerator Box gives instant access to a cold drink of water from the Filter Canister inside the refrigerator.
We have since made some small modifications to the inside of the Freezer Box.
We found that if frozen foods were tightly packed inside the box, that it was difficult to keep some of it frozen. The problem seemed to be this large mass of frozen food was at some point 2' away from the Holding Plates.
 Lying against the side of the inner box, some foods tended to want to gravitate towards the temperatures nearby...and that was outside the box/insulation. What was needed, was a way to create a cold airspace around some or much of the food, that would allow the temperatures inside the box to be balanced. The desired temperature was that of the Holding Plates, so we needed to get air to circulate around the box to all food as well as the holding plates.
In the "Outside Building Material section" we found a plastic lattice (white) material in 2x8' sections. I bought one as well as some other odd plastic molding(gray), and some small PVC tubing.
 Using the PVC tubing to hold sections of the lattice off the sides of the interior Freezer box, air could now circulate around and through the contents. Airflow from Plates and around box liner could now reach all sides of the stored food. We also now make sure we allow a bit of space between the items as we load the freezer. Works Perfectly! Rock Solid contents now! This improving of air flow, is a simple weekend task for many boaters! Try it.


No comments:
Post a Comment