Pilothouse Windows
When I bought my CSY Pilothouse, it was missing an item that made these vessels really appealing to me, "Strong Windows." For some reason the manufacturer did not install the famed extruded bronze framed tempered glass windows it bragged about, that were made by a window manufacturer that made such windows for tugs and ships. It chose to ship my boat out the door with nothing but 3/8" acrylic clear panels screwed to the outer surface of the pilothouse with edges covered by trimmed pieces of bronze angle material. This was fine, if I were to stick to bay sailing, but certainly not enough for an offshore boat.
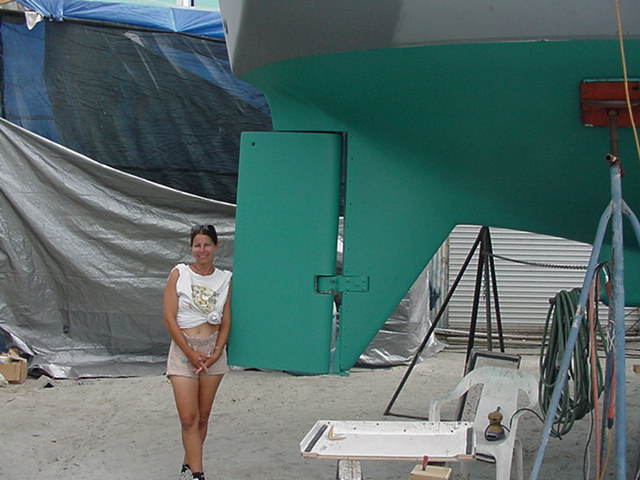
I researched for years, the best way to rectify this problem. Many contacts with marine window manufacturers and material suppliers finally gave me direction. Windows made by any manufacturer would have to be custom and therefore quite expensive. Any window built FLAT/SQUARE would not fit flush to the Curved Structure of the Pilothouse deck mold. Having 4 windows on each side, 2 in the back and 3 forward, meant 13 custom (3 opening) windows, that would then have to have a 'Built up' surface to mount to. Lot's of work that way, and besides cost, no "Time" benefit. Expecting to go offshore and someday get my butt handed to me out there, I had decided to make the replacement windows myself, that would then be capable of withstanding anything waves could throw at me. In doing the work myself, I'd also save the cost and labor and overpriced materials. This photo shows the first layer of 1/2" clear acrylic windows already in place. I'll go back to show some more of the 'work' but wanted you to see/understand the CURVE of the outside of the Pilothouse that had to be considered. These Inner windows were bonded with flexible adhesive sealant to 1" frames of 6000 series aluminum angle(rigid structural grade-non corroding aluminum). The Aluminum Frames could be made to each internal dimension required, then bonded to the internal grid I built and bonded to the inside of the pilothouse. Over these clear windows would be 'Permanent Storm Windows' which would overlap by 2" above, below, fore and aft.

Freeman, a major marine window manufacturer out west, had the windows I wanted. Pure and simple, they had what I wanted, but I could not afford them. They supply the Coast Guard with the windows and doors for the super bar running vessels in the NW and elsewhere. However, I could not afford these.
Several other manufacturers, had options, but because of price or design, I discounted them, deciding instead to design/solve the dilemma here at my own dock.
 Notice that I had to rework the corners of the original square cut corners to fit the new mitered corners. This was done using a router to cut 3/16" deep into structure, then bonding in the appropriate piece with epoxy and finishing off the outside before window was finally installed.
Anyway, I chose 1/2" Clear Acrylic for my glazing material on inside windows. Outside of these, would be a permanently installed (overlapping by 2")Storm Window, made of 1/2" grey tinted Acrylic. Both layers of window would use the Optional Scratch Resistant material these manufacturers offered. This additional glazing almost doubled the cost of the material, but I thought "better to protect the acrylic now than look at scratched windows later." Mistake. The coating applied to the acrylic did not hold up. Eventually material from the top two manufacturers were used and neither one held up. Note to anyone reading this, that it is now my recommendation to go with the less expensive, standard, non-scratch resistant material, and just take care of it.
I do recommend though to use a good dark grey tint as this eliminates 87% of the U.V. light rays and this considerably cuts down on heat transferred through the windows.
To add to the strength and sealing capabilities of the windows, I also decided to strengthen the pilothouse itself. This might sound crazy to some, but I considered a breaking wave's impact, should one or more ever occur and thought the shifting of the pilothouse a possibility. Now was the time to address possibilities. After CSY cut out all 13 holes in the pilothouse, there was a great deal of structural material missing. IF, the heavy bronze windows originally designed to be bolted into place, were used on my boat, I would have felt fine, but starting from scratch, I chose to strengthen the structure first, then install framed windows into the existing openings. To do this, a mold was made to make fiberglass C channels.

Some of the C channels would be cut lengthwise to make angle channels (One internal 90deg. angle, rather than Two).

The Channels were made from 7 layers of Bi axial 1708 Fabmat(2 layers of sewn fiberglass stranded material and one layer of Mat-nothing woven-straight strands for optimum strength). West System Epoxy was the binding material. Squeegeed out, the final material was about 1/4" thick.

Individual pieces were cut to exact size using a circular saw for lengthwise cuts, then sabre saw for short cuts, and a handheld belt sander for working the edges.

Applied to the interior of the pilothouse was accomplished by first grinding off the interior gel coat wherever the new framework was going to be applied. Talk about a dusty job! We used a shop vacuum and air scoop to capture most but the dust found every nook and cranny in the boat...and us.
 These final, custom shaped Pieces, were then bonded with West System material. Set up before hand by predrilling and temporarily installing all pieces, made certain the bonded pieces were going to fit perfectly. The day after installation with the epoxy, the set screws were removed.
Window frames were made from 1", 6000 series structural aluminum angle and screwed and bonded with 5200 to the interior holes of the new structure.
The clear glazing 1/2" thick acrylic was then installed inside the aluminum frames with Boat Life's "Life Seal". I looked at Sika, Dow, 3M and several other adhesive caulks/sealants, most with a great product line. In the end, the choice was personal and had to do as much with cost and availability as with specifications . Much reading was done, late at night on the Internet, but this was done many months earlier. When the project was done, all materials had been pre-chosen and pre-purchased.
Most of the inner windows were installed first, then the more difficult installation of the custom front opening window. I had to modify the structure from a square cut out to a mitered opening(rounded edges).
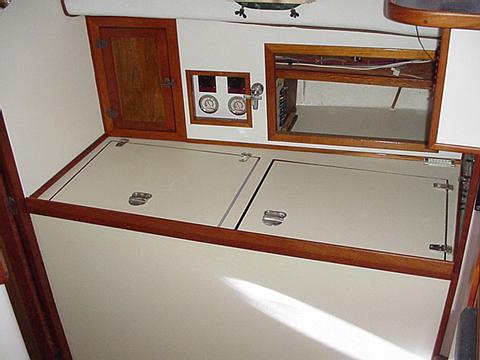
In the rear 2 windows, I cut out an opening in them and installed a pair of bronze opening ports I bought in a consignment shop years earlier. They were found up in a marine consignment shop in Annapolis and probably were 75 years old. I had taken them apart, sand blasted them, applied new gasketing and made new hinge pins.
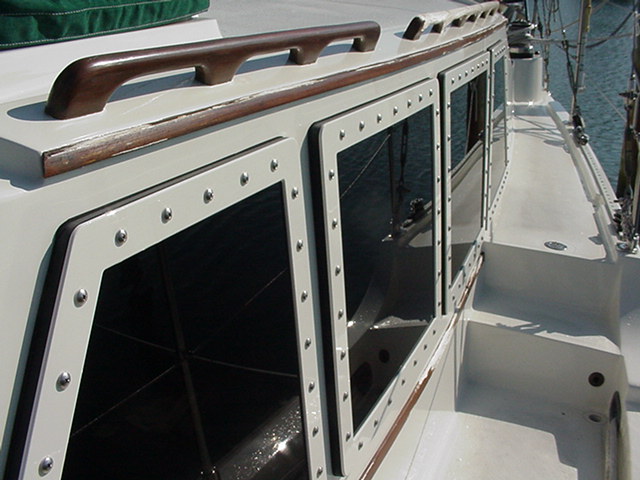
After the boat was completely painted with Awlgrip, in 2000, I installed the outer Storm Windows

and custom Aluminum frames I had made, also of structural 6000 series material. (6000 is rigid/5000 is flexible)

The entire project took too long, cost too much and was a brain teaser from the beginning, constantly testing my abilities to solve problems. However, all worked out well and we are very satisfied with the end results.
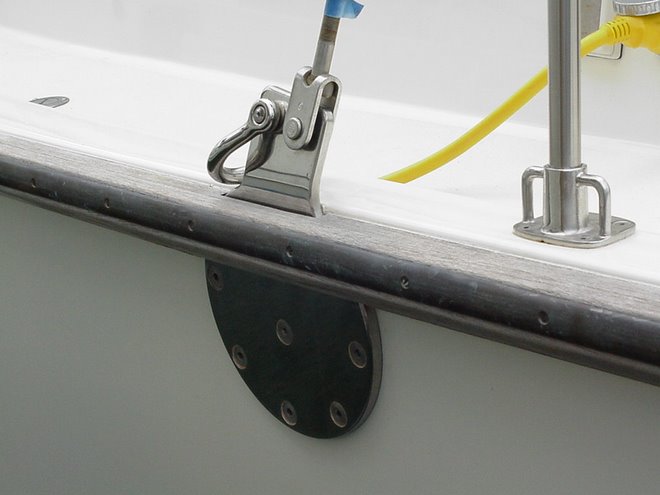
Failures? Yes, one. I had designed and implemented a system of tubes to connect the lower left and upper right side of the "Internal spaces" between the inner and outer windows. Basically I was trying to make a "thermo-pane" type window, in hopes of being able to combat moisture build up between the inner window and outer storm window. At first, I used this 3-5 times, while the outer 2"x 1/2" seal(storm window) was perfect. The plug from one tube would be removed and the plug from the end of the other tube inserted into our 1 gallon shop vacuum hose, would clear moisture in 10 seconds or so.

However, the outer seal, EPDM rubber from Goodyear, shrunk enough to loose the perfect seal. In the end, I found we did not need the thermo-pane quality, but if I did, I would/and might replace the seals with something else. The tubing idea worked, the Goodyear rubber did not.


No comments:
Post a Comment