Cutlass Bearing Modification and a Removal Tool

The first haul out of our boat, left us in the boat yard for 8-9 months working every day. We did a lot of modifications and many normal boat projects. This mod began as a simple change out of a cutlass bearing, but ended up with some overall improvements.
To protect the threads for a few years under the water and prevent them from filling with bottom paint even before it gets there, a half inch of PVC threaded plumping part is screwed over the threads and left there until required removal of the cutlass in the future.
It was obvious that the old cutlass bearing was well worn and needed replacement but the interior of the shaft tube showed damage from  another workers earlier butchery. To make things worse, the cutlass bearing seemed to be bonded into the tube with an adhesive sealant. No one should ever bond a cutlass bearing in! I borrowed a sawsall with the appropriate bi-metal blade and proceeded to cut the cutlass lengthwise internally, both top and bottom. Then, some work with thin bladed screwdrivers as my sacrificial tools after some heating of the cutlass bearing, I managed to break the bond of the adhesive. Next, get one half of the old bearing out, then the other.
Glass work done and ready for drilling.
A further clean up ensued, but the damage from an early neanderthal yard worker, gave me pause as to the best approach from here. I should mention that the small bolts that should have been present to hold the bearing from turning within the shaft tube, were missing and the holes filled in. My plan became a small extension to the keel area supporting the cutlass bearing. This solved and improved several things. In the process of this new glass work, the interior of the tube would be repaired to a perfect surface, a new and better security bolting system for the bearing would evolve and support of the shaft closer to the propeller should keep things running smoother. The original prop sat over 6" aft of the hull section holding the shaft. I believe the maximum distance a shaft should be left unsupported is 1.5 x the diameter of the shaft. That said, the forward end of the propeller hub, on a 1.5" shaft, should be no more than 2.25" from the support of strut/keel/cutlass bearing. Just enough for a zinc! I'm sure this formula is more necessary on high reving power boats and not so important on our slow turning sail boat engines, but support is good and it lessens wear on the cutlass bearing.
I ground down some of the existing old fiberglass and re glassed 1-2" strips of GRP into and around a length of 2" PVC shoved into the shaft tube. (the interior of the CSY 44' shaft tube is 2.375" and that is the O.D. of a standard piece of PVC 2" plumbing pipe.) I built up the area more than I thought it needed over several short layups, to allow a chemical kick, but not too close together to prevent overheating of the chemicals...then let it all kick off for the ni ght. Next day, I removed the PVC...(be sure to use a mold release on the tube so you CAN get it out.) Once out, the area was ready to meet my grinder. I then sculpted the glass to the shape I thought best and finished by hand sanding, some fairing for minor imperfections, some more sanding then drilling for 'set bolts'.
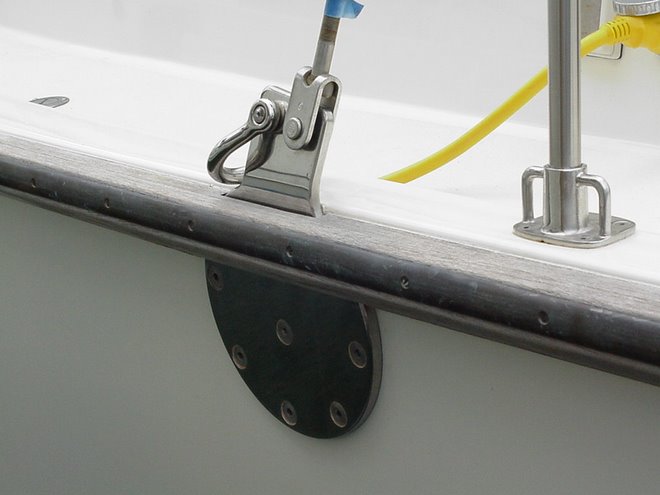
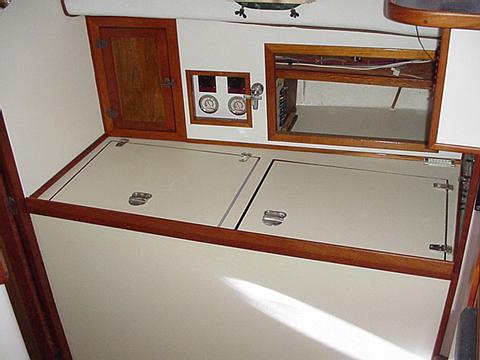
Obviously a few years later. Hard to note in this photo, but the 3 set bolts have their heads drilled to accept monel seizing wire used to secure them together.
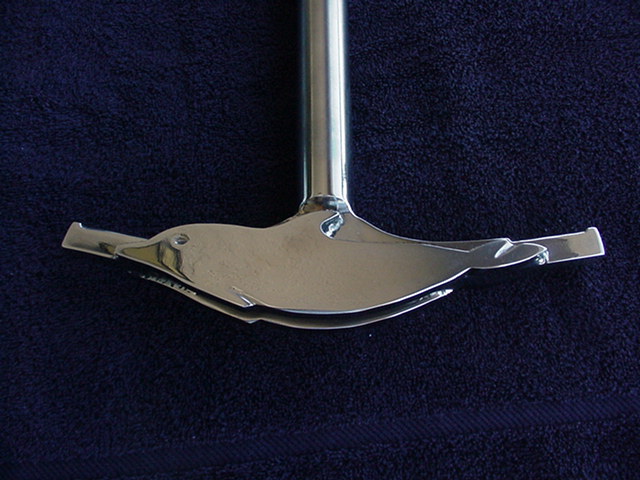
The Cutlass Bearing and a spare, were taken to my favorite machine shop and threads were cut lightly into the last 1/2" of one end of the bearings. This last .5" would not be pressed into the keel section but instead, left out for future use of a Removal Tool, which I was also building.
Cutlass photo compliments of Warren Daniels
The "Idea" was, to have a tool that could easily remove the bearing in the future by grabbing it on the outside[shaft can be left in place which makes this job sooooo much simpler and can even be done in the water by a diver]. In addition or almost as important as anything else, is that you do not have to remove your shaft if you prepare yourself with one of these easily built tools. No Shaft Removal!
A standard galvanized 2" Pipe Coupling added to an 8" pipe nipple with an added 2" pipe cap, almost completes the tool. All that is needed for completion is for the end of the cap to be modified by brazing on a nut over a drilled hole in the cap. A threaded bolt, can then be screwed into the c ap via the nut and you now have a "puller".
You do have to pull the prop first so that the tool can be placed over the shaft and screwed onto the Cutlass Bearing. Then with just a small wrench, tighten the bolt until it presses onto the end of the shaft and slowly pulls the bearing out of the hull.
Although I suggest using a standard bolt with a hex head, I still have my 'first' edition slotted threaded rod. I'll get to replace that, I promise.


No comments:
Post a Comment